
YCCUON Fundraiser Program: Step-by-Step Organizer Onboarding Guide
Welcome to the YCCUON onboarding guide. This resource is designed to help teachers, coaches, booster club officers, church representatives, and nonprofit coordinators set up their accounts, choose payout formats (Stripe Connect vs. e-signed check), design storefronts, and manage supporters using the live website portals.
Interactive Document Index
How the YCCUON Fundraiser Program Works
The YCCUON Fundraiser Platform allows local organizations (schools, sports teams, church groups, bands) to raise funds by selling digital and physical "Local Savings Passes". Supporters purchase the passes to unlock valuable discounts from local merchants, while the organization receives the proceeds directly via their chosen payout method.
Before You Begin: Preparation Checklist
To help your onboarding go as smoothly as possible, gather the following details before starting the registration page:
- ✓ Fundraiser Campaign Logo / Mascot: A high-resolution graphic or photo (PNG or JPG format) representing your group or school.
- ✓ Campaign Story Description: A written pitch explaining what the funds will achieve (e.g. purchasing new sports uniforms, funding trip travels, or buying class resources).
- ✓ Gallery Photos: 3 to 5 clear action photos of your team, students, or organization members.
- ✓ Banking Information (for Direct Deposit): The routing number and checking account number of the account where you want your fundraiser payouts deposited via Stripe Connect.
- ✓ EIN / Tax ID (for Checks & Stripe): The Federal Employer Identification Number belonging to your school, booster club, church, or non-profit organization.
- ✓ Mailing & Representative Info (for Checks): The physical address where physical check payments should be sent, as well as the details needed to sign the digital W-9 taxpayer certification form.
The platform's core components are structured to onboard organizers, configure banking or check disbursement tracks, allow multi-participant roster invites, and track marketing metrics in real time.
Organizer & Payout Setup
Create accounts, select payout routes, and complete Stripe banking checks or digital W-9 forms.
Campaign Setup
Select plans, submit storefront content, process design fees (or apply administrator waivers), and launch.
Supporters Outreach
Add support lists, queue automated SMS outreaches, and collect direct deposits or check allocations.
Step 1: Account & Payout Setup
Setting up your fundraiser account is a simple process. First, we will walk you through the account credentials form, choosing how you want to receive your fundraising payouts, and configuring Stripe or e-signed W-9 check records.
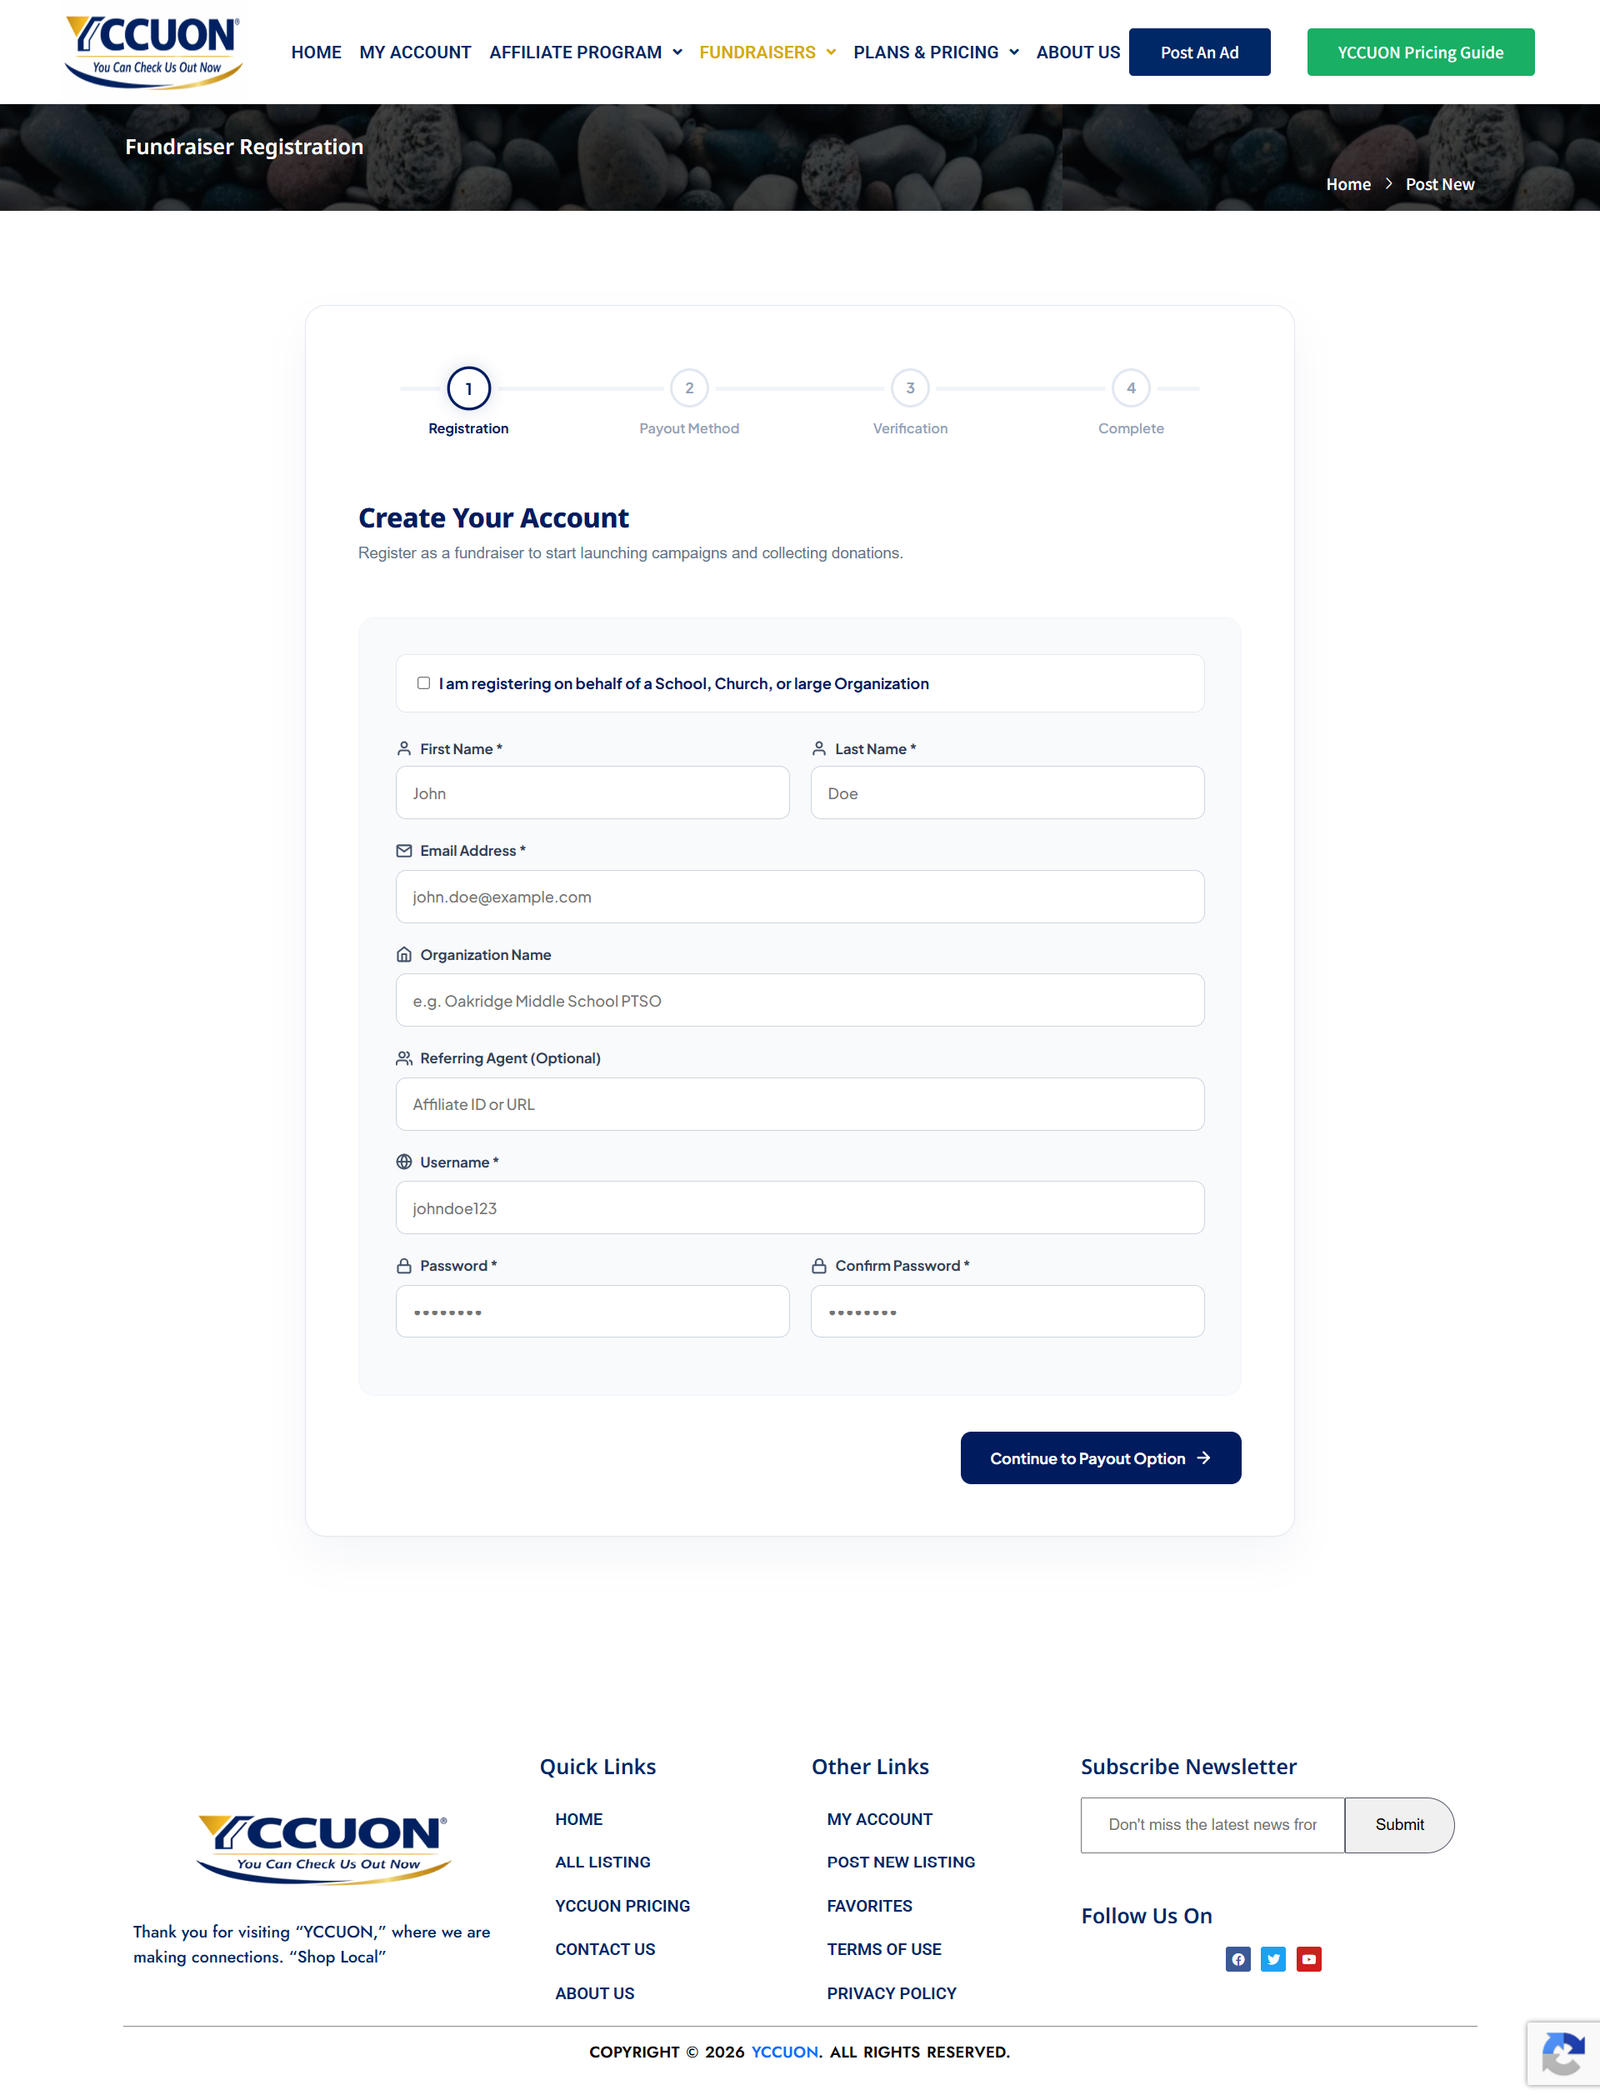
Step 1.1: Fill Out Account Credentials
Open the registration page and enter your name, contact email, organization name, and choose a unique username and secure password. If you are referred by a YCCUON sales agent, enter their affiliate code or referral URL. We save your account credentials immediately so you don't lose progress. Click "Continue to Payout Option" to save and proceed.
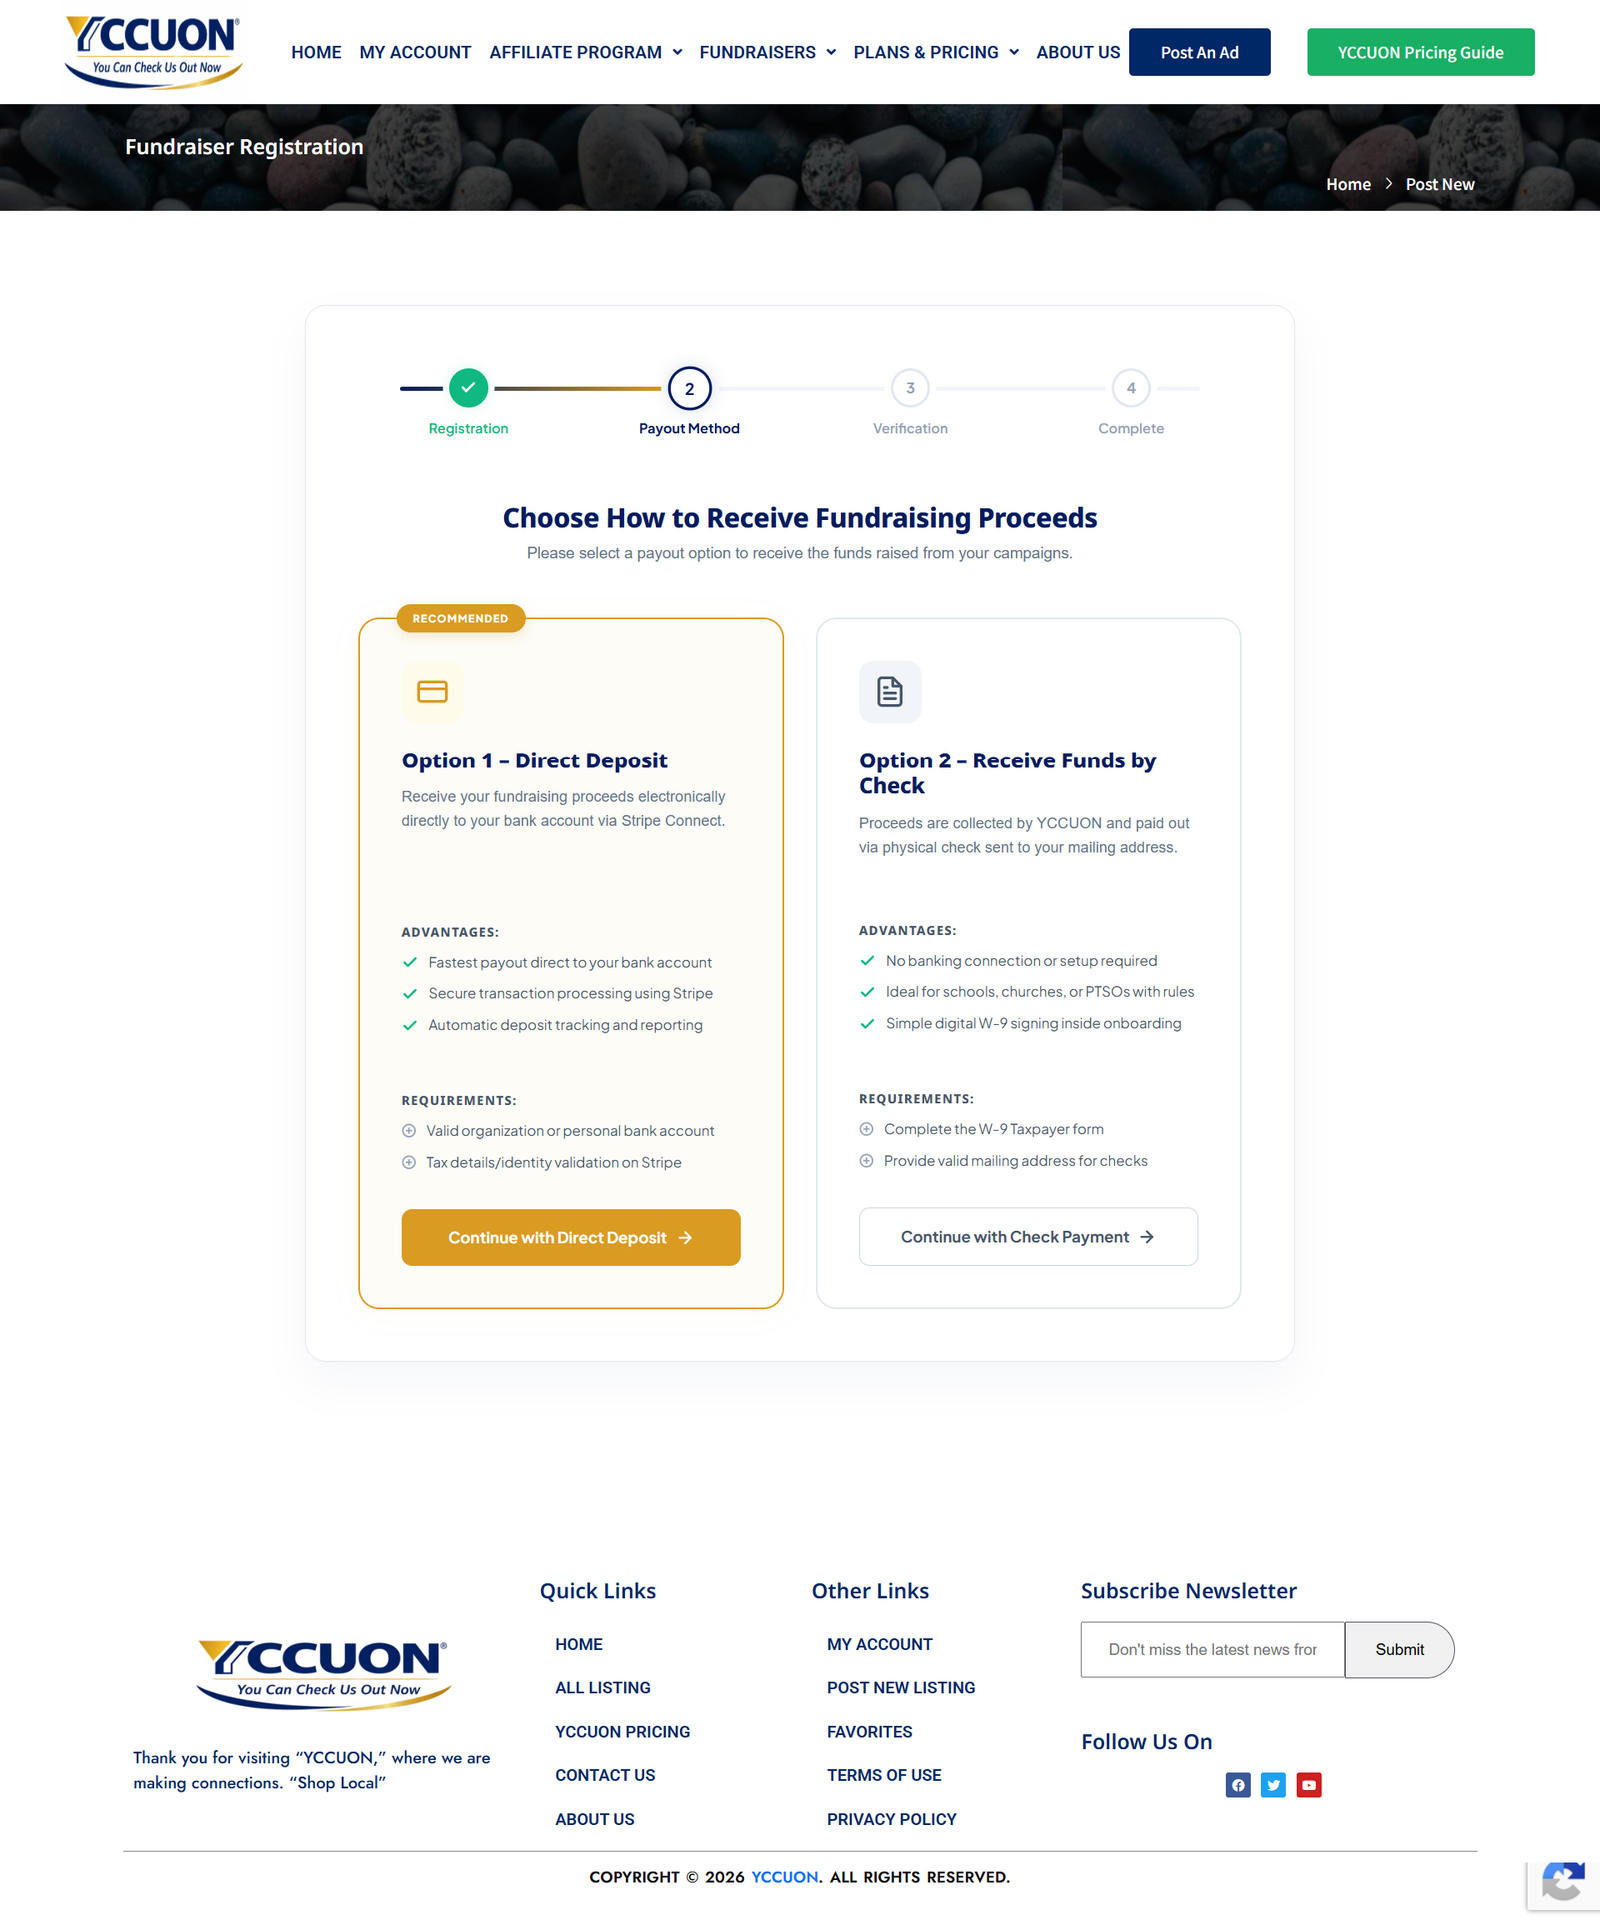
Step 1.2: Select Payout Method
Next, you will be prompted to select how your organization wants to collect funds. You can choose either Direct Deposit (via Stripe Connect) or Physical Check (via e-signed W-9 check mailing).
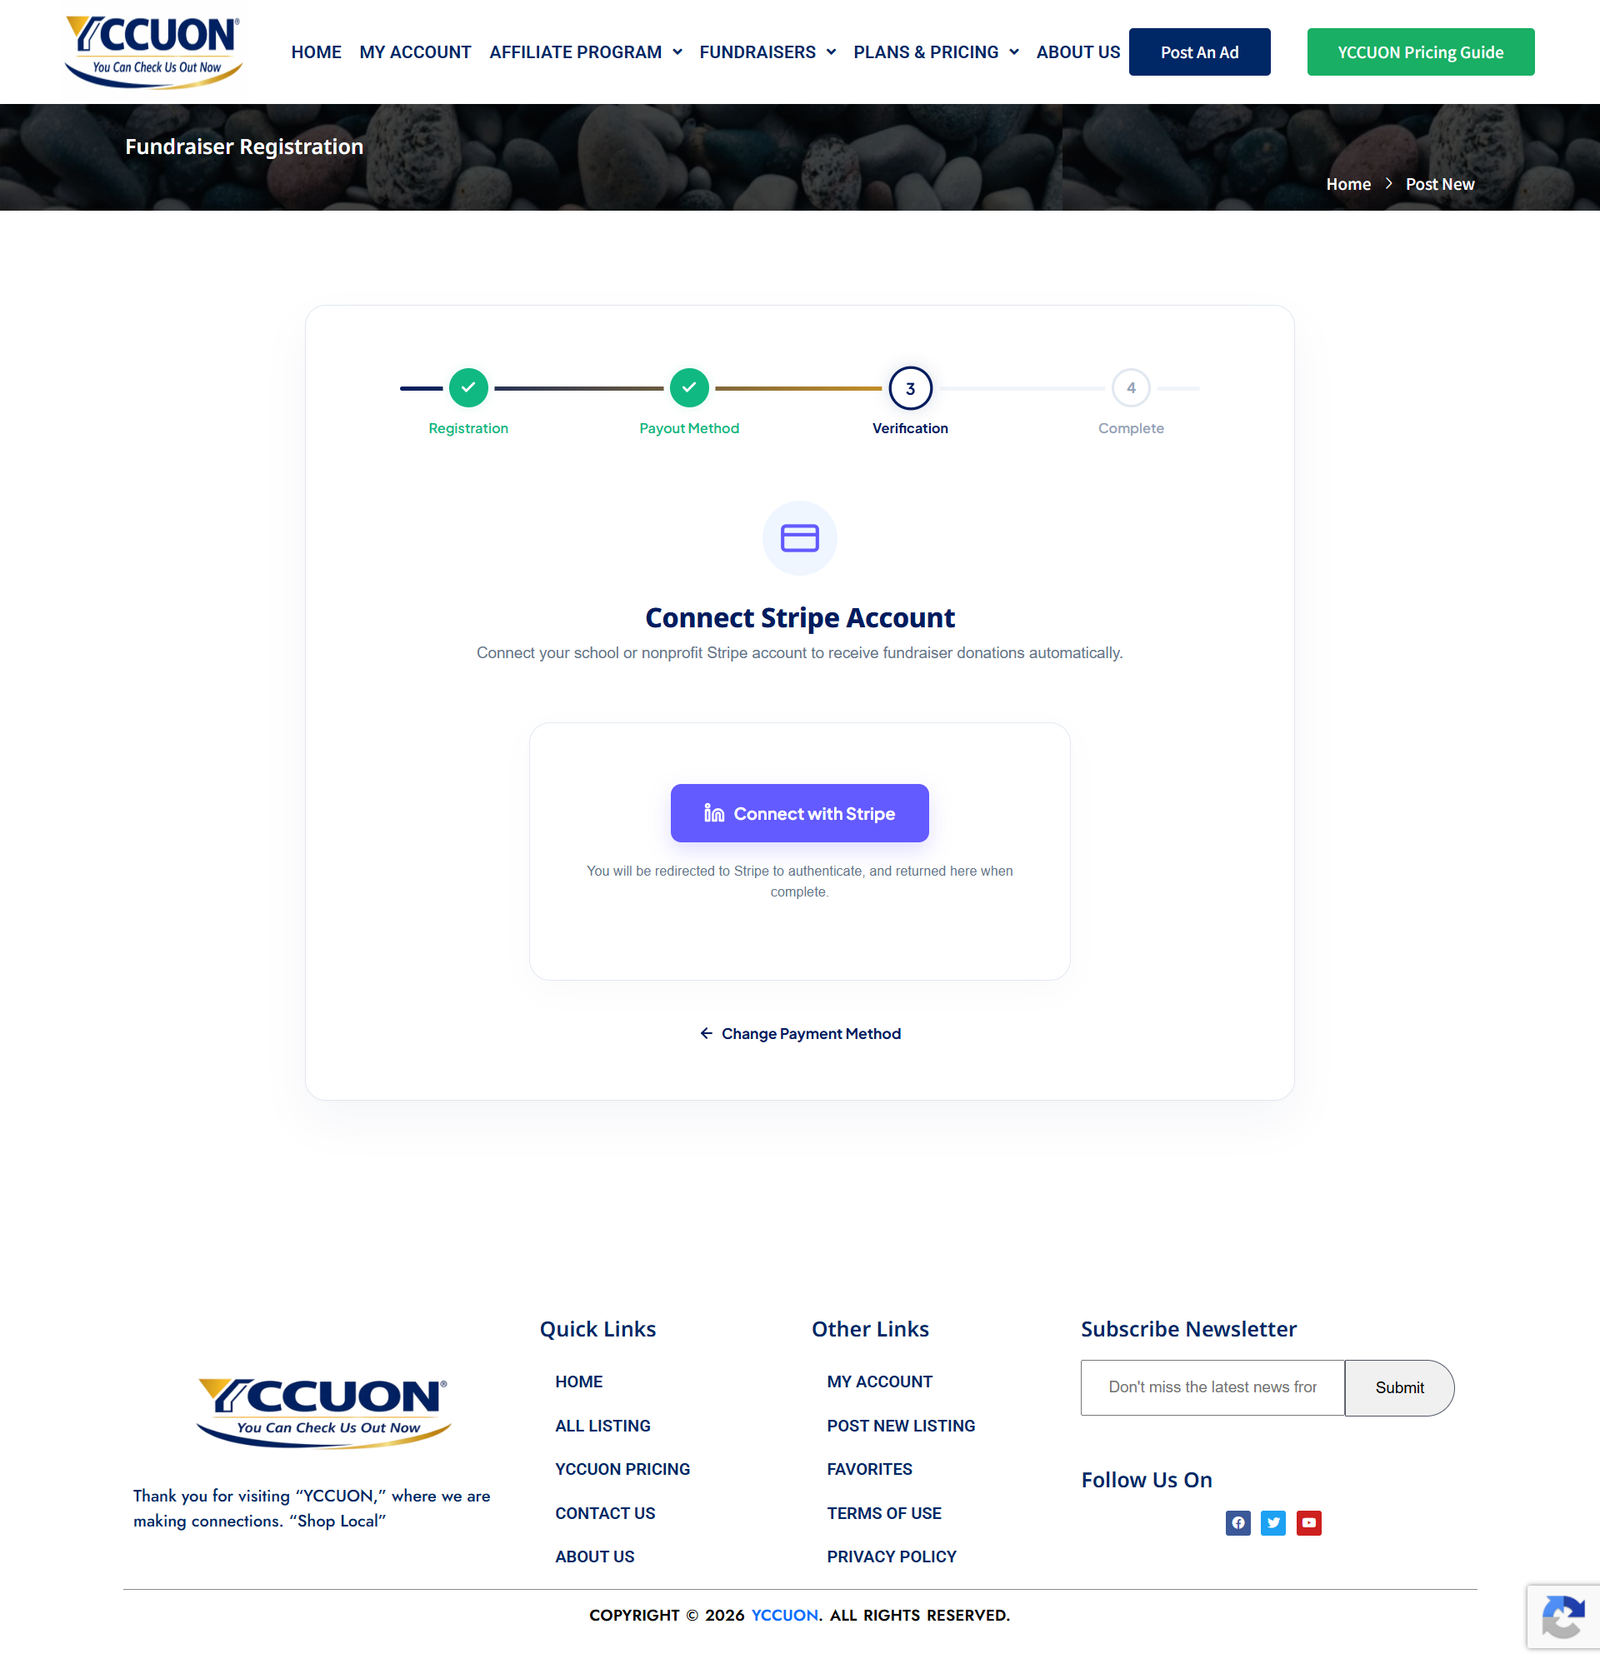
Step 1.3: Verification & Security Setup (Stripe Connect / W-9 Checks)
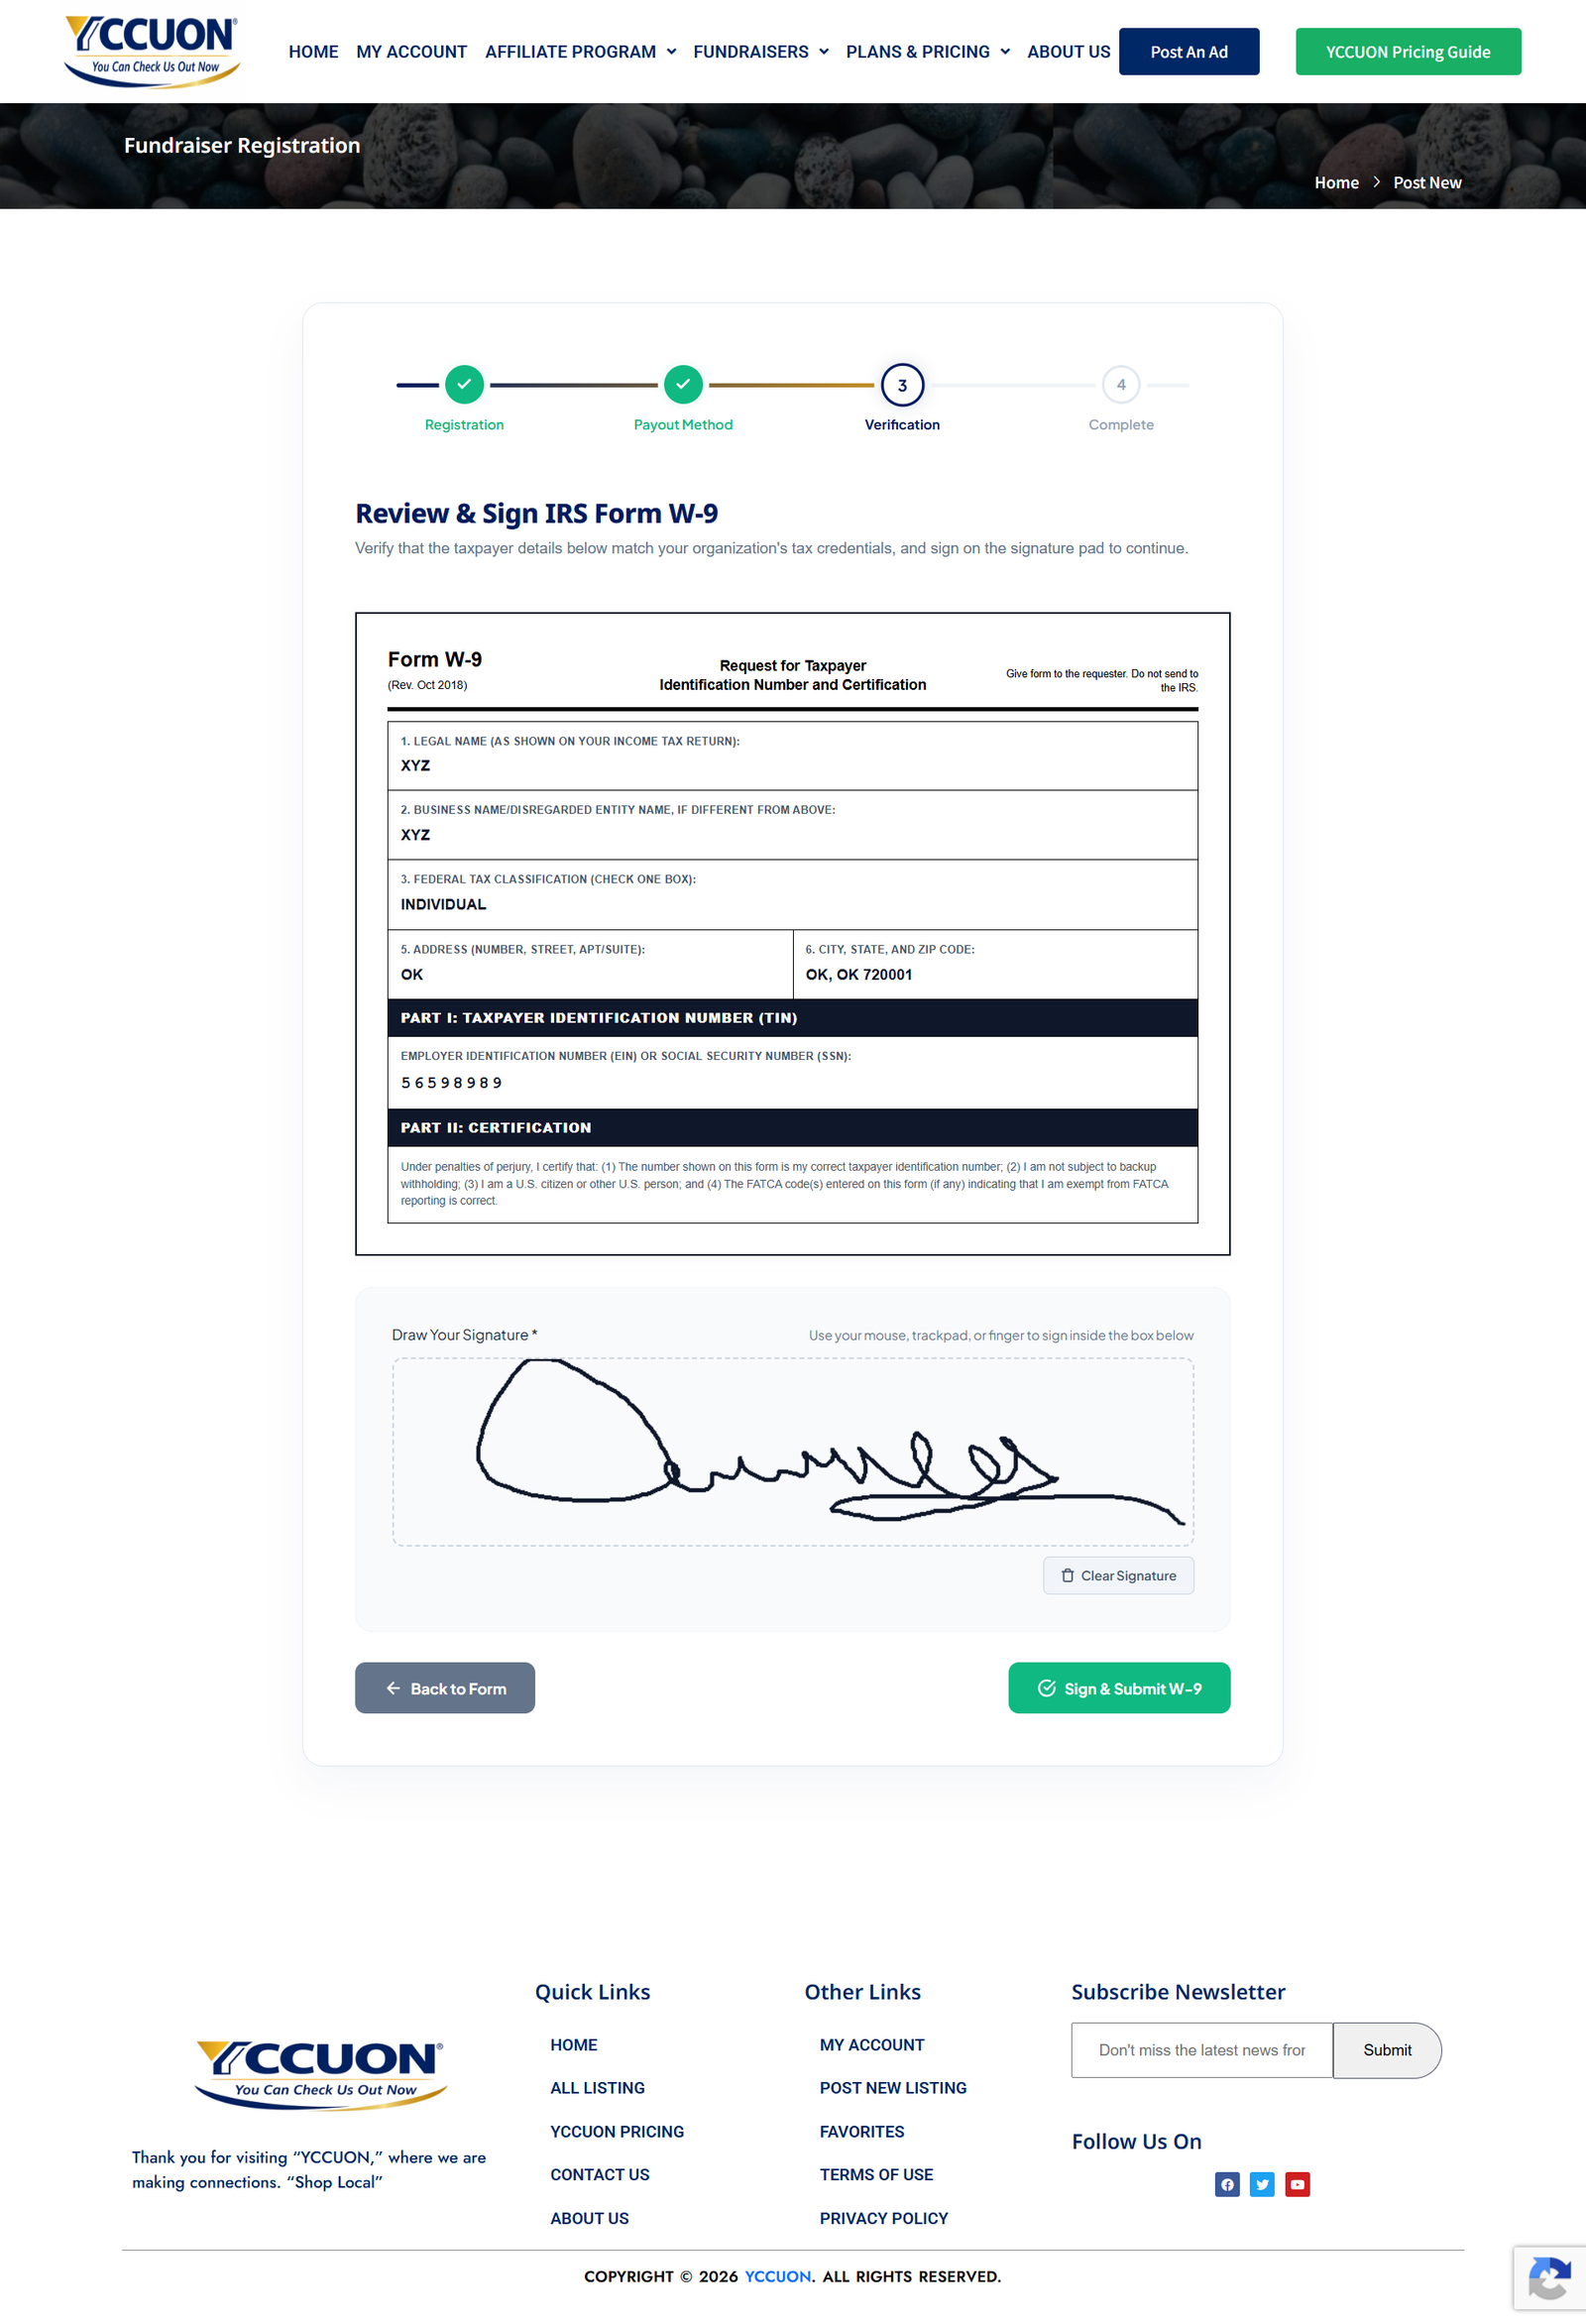
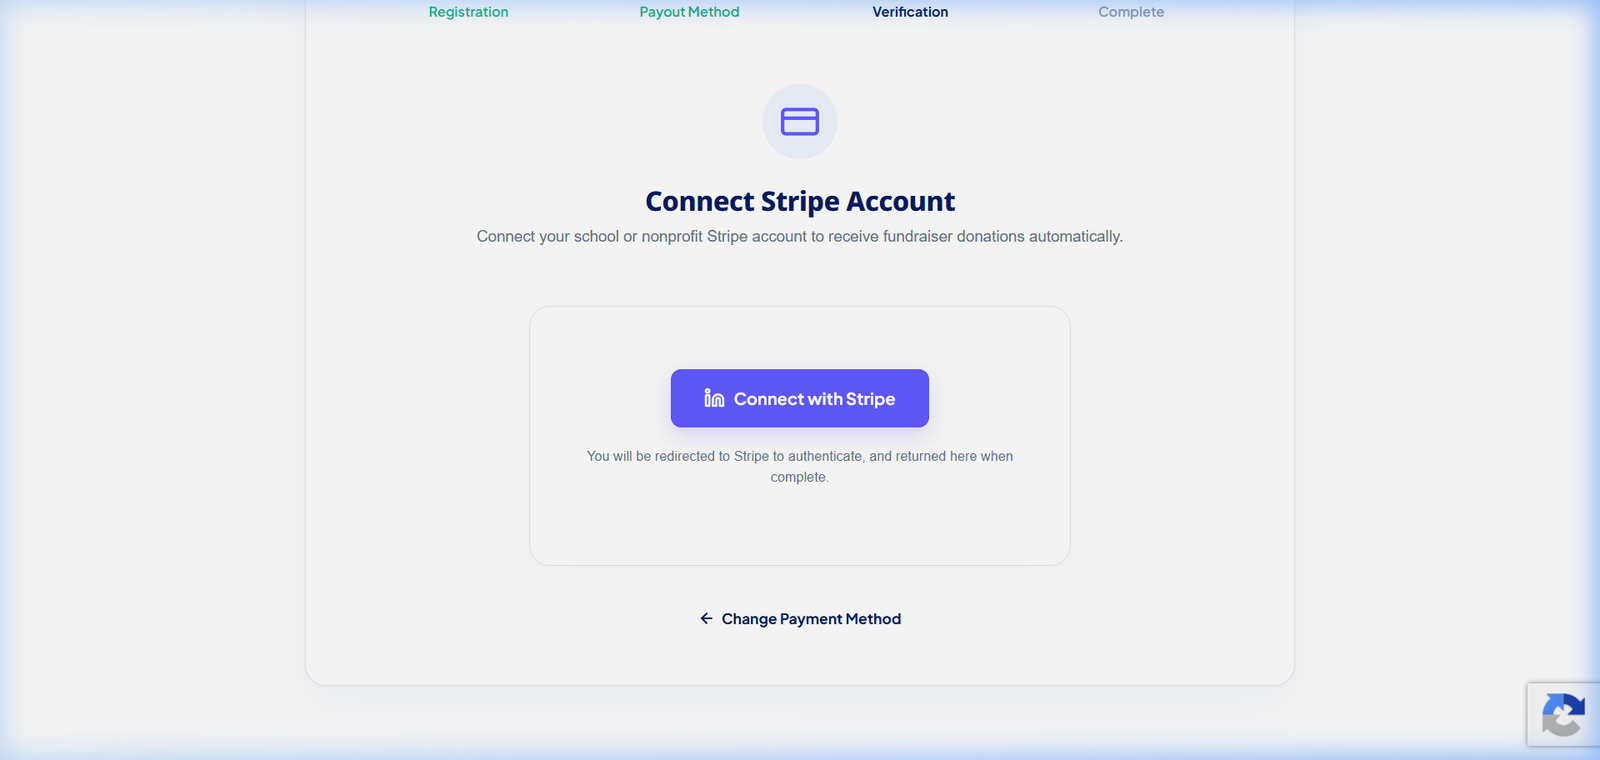
In Step 3, the wizard configures verification. If you choose Stripe, click "Connect with Stripe". If you choose checks, you must complete the W-9 taxpayer information form (Legal Name, DBA, Tax ID, address) and draw your signature on the interactive e-signature canvas to generate the W-9 PDF on the server.
If check payout is selected, you will be prompted to draw your signature in the interactive signature panel after entering taxpayer information fields, as shown below:
Security Verification & PDF Storage:
Once the coordinator draws their signature and submits the W-9 form, the platform uses its integrated Dompdf library to instantly generate an IRS-compliant Form W-9 PDF. The file is saved in a secure, non-public directory (/wp-content/uploads/yccuon-w9s/) protected with Deny from all Apache configurations to ensure taxpayer data remains completely safe.
Step 1.4: Stripe Connection Form (Stripe Redirect Setup)
If Stripe Direct Deposit is selected, clicking "Connect with Stripe" redirects you to the Stripe bank connect page. Make sure to choose your business type (Government, Nonprofit, or Individual), EIN, routing and checking account details as required:
Step 1.5: Registration Complete & Campaign Redirect
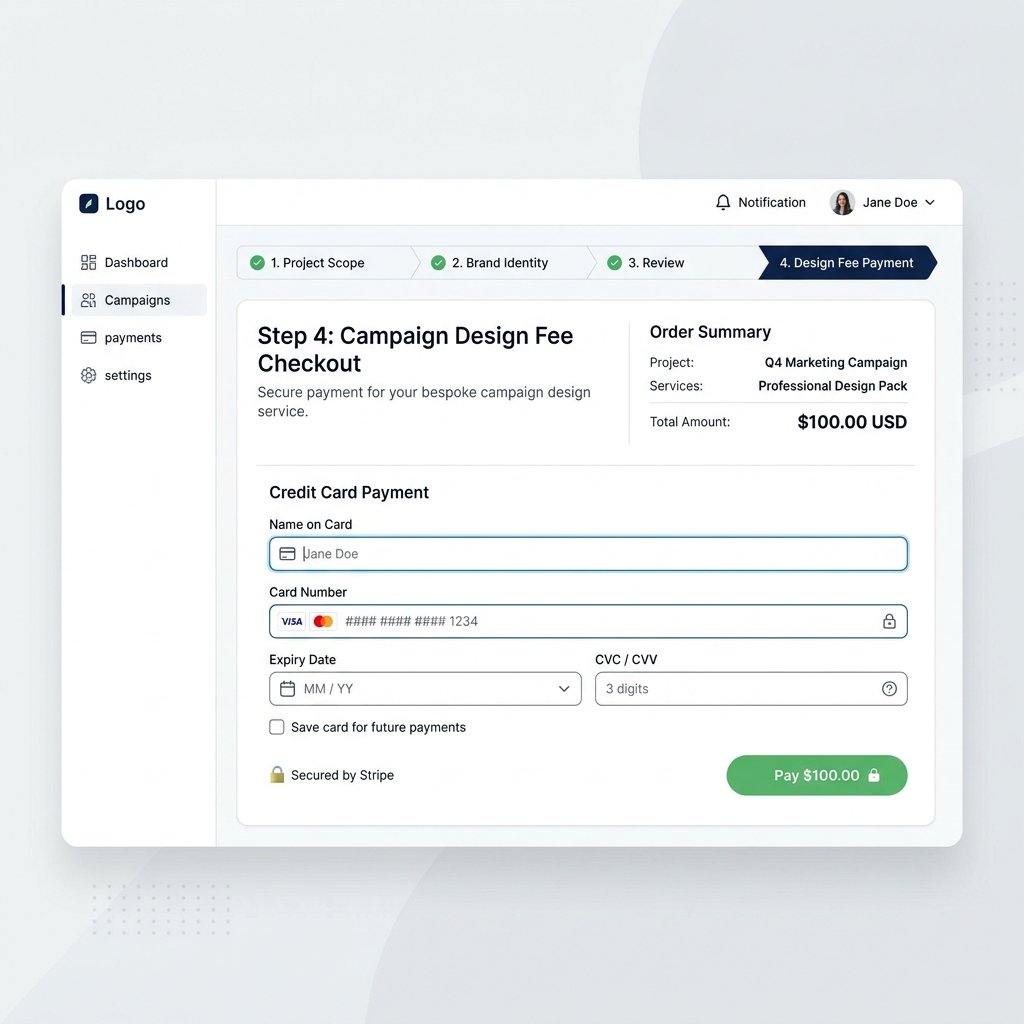
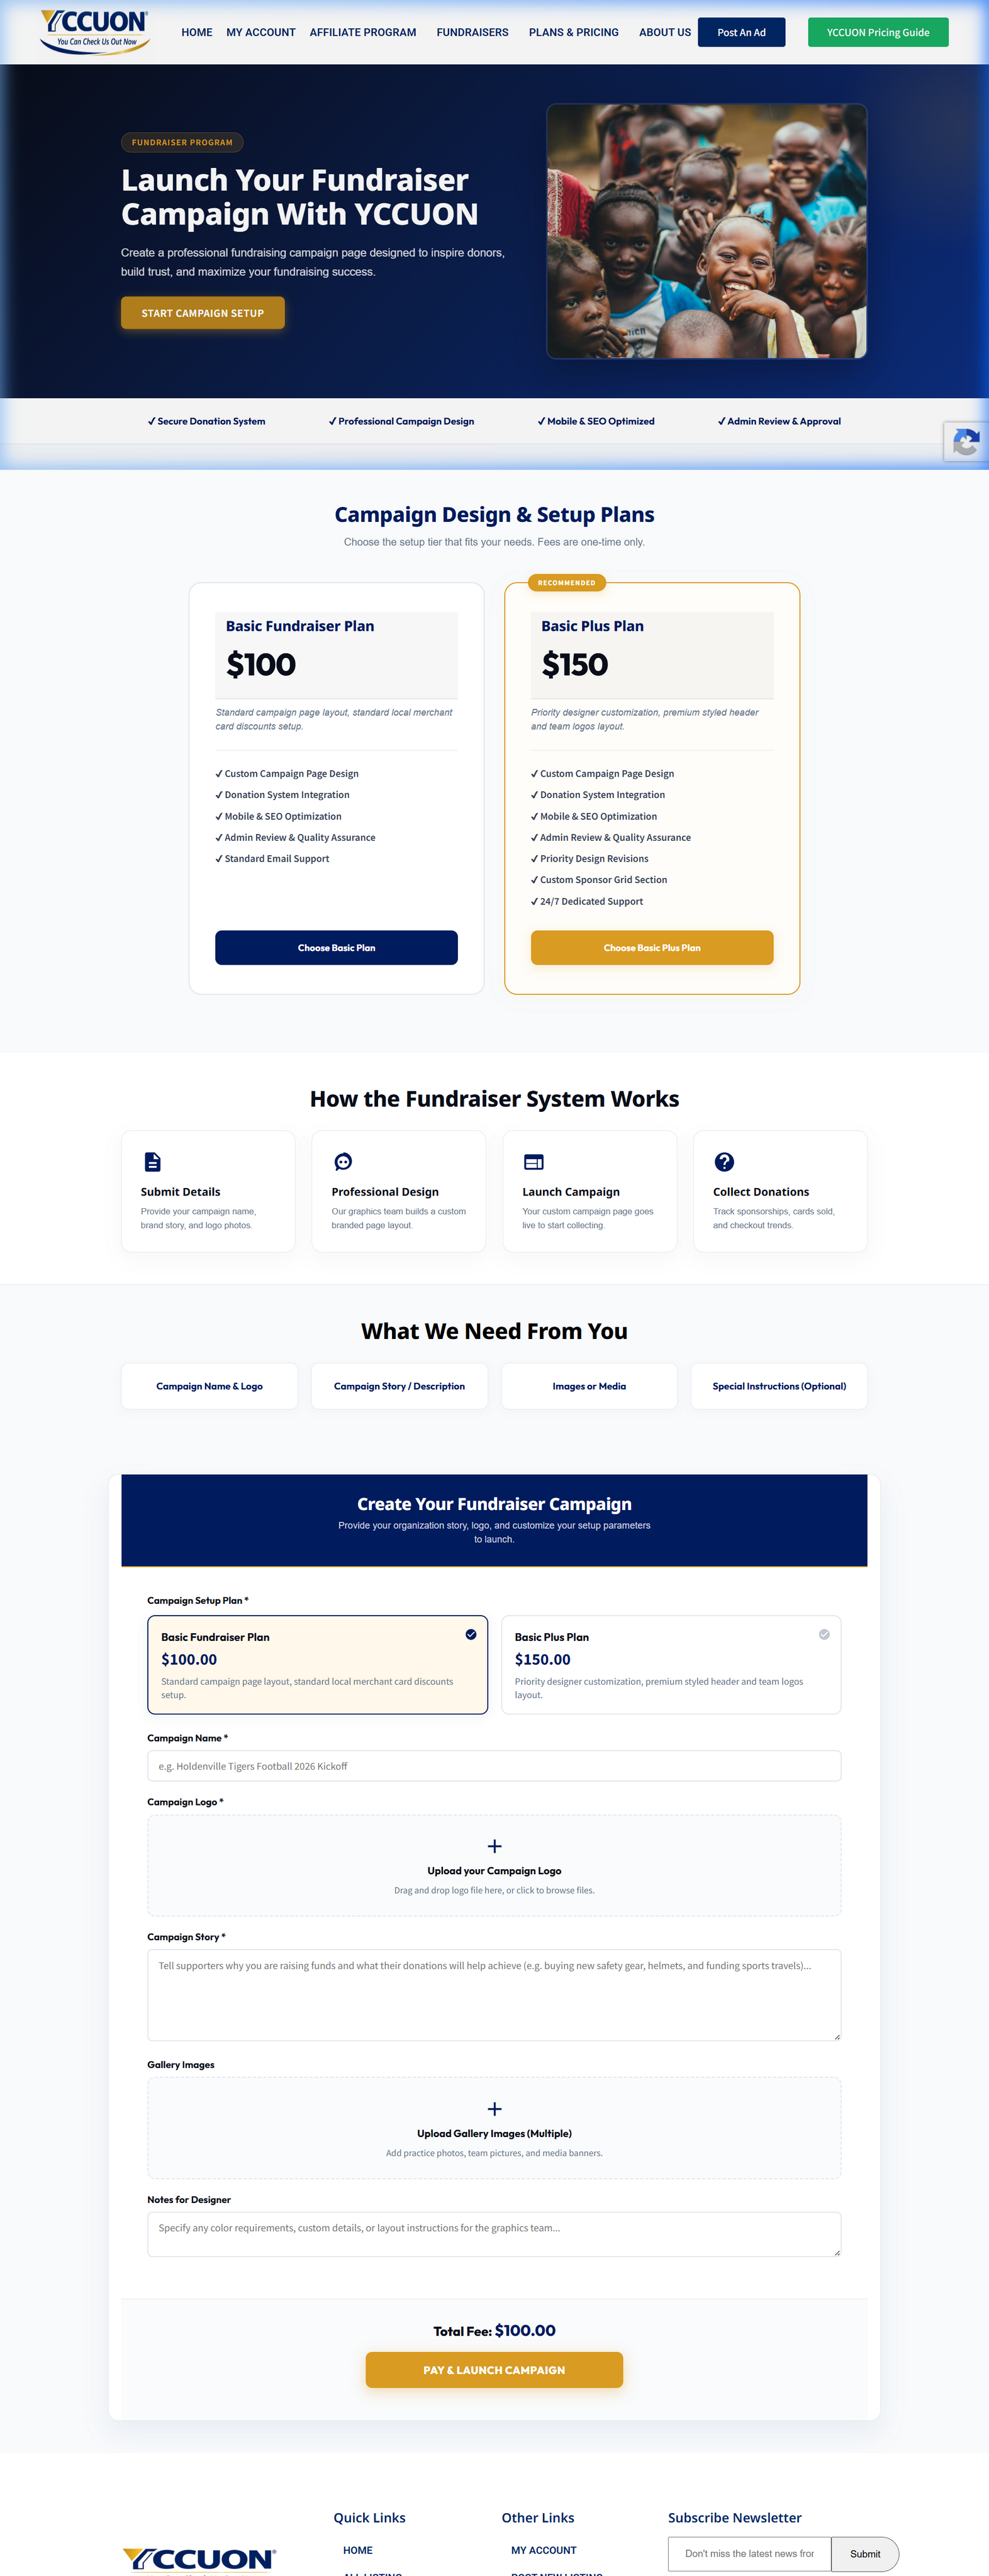
Once the payout records are validated, the registration wizard redirects you to the success panel. Click "Setup Campaign & Fees Info" to redirect to the campaign setup wizard, choose your design plans ($100 Basic or $150 Basic Plus), and launch your storefront.
Step 2: Set Up Your Storefront
Now, you will configure your fundraiser campaign storefront. First, choose the setup plan that fits your campaign:
1. Single Fundraiser storefront
A standalone campaign running a single storefront (such as a local sports team or band seeking specific equipment).
2. Fundraiser Organization (Multi-Roster)
A nested institutional structure hosting multiple registered participants (e.g. school rosters, class divisions, player roster pools).
Campaign Design Fee Waiver (NEW Option)
Administrators have the capability to waive the design setup fee for designated partners, schools, or charities. If an admin logs into the WordPress backend and toggles the "Waive Campaign Design Fee" option inside your user profile, the pricing wizard is bypassed:
Campaign Design Fee Waived Banner (Onscreen View)
An administrator has waived the one-time $100 setup fee for your account. You can complete your mascot files upload and submit design notes to launch your campaign for free without payment redirect.
Campaign Setup Page View
Below is the live setup page interface. Organizers can select between Basic ($100) or Basic Plus ($150) design plans:
Campaign Creation Form Fields
- • Campaign Name: The public name of your page.
Example: "Springfield High School Band Mascot Savings Pass Campaign 2026" - • Campaign Logo: Upload your official MASCOT or logo graphic.
- • Campaign Story: Describe why you are raising funds.
Example: "We are raising funds to buy new uniforms and cover travel expenses for our school band's annual state competition. Your purchase of a local savings pass directly supports our students and unlocks amazing discounts at 20+ local restaurants and merchants!" - • Gallery Images: Upload multiple action photos of your team, club practice, or community event.
- • Notes for Designer: Specific color and styling requests for our web design team.
Example: "Please use our school colors (Emerald Green and Gold) for the page headers. We would like our tiger mascot logo displayed prominently at the top of the page. Please include the group photo of the band members in the center gallery."
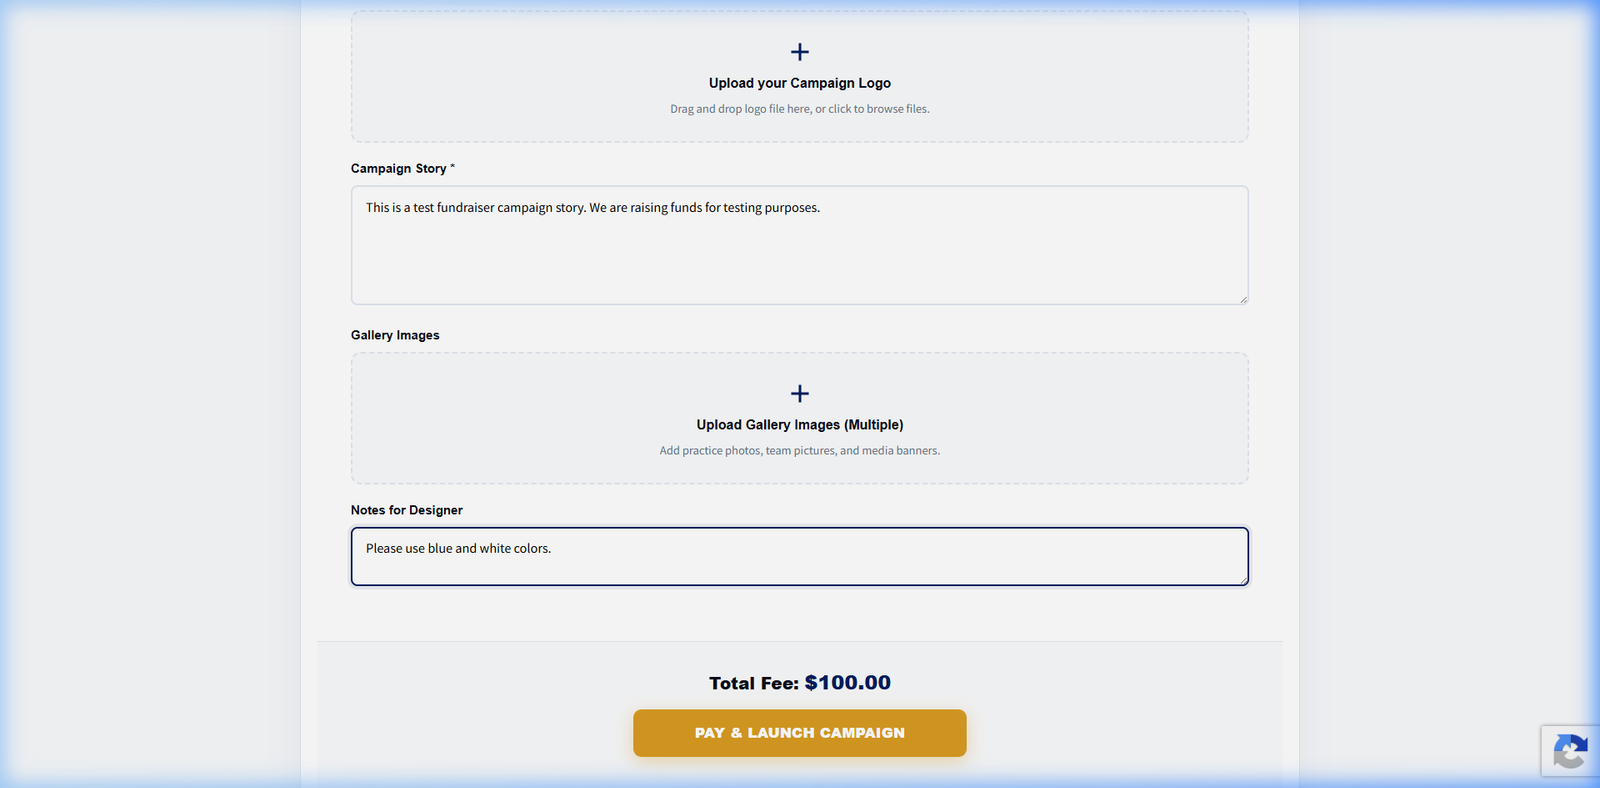
Setup Billing & Launch
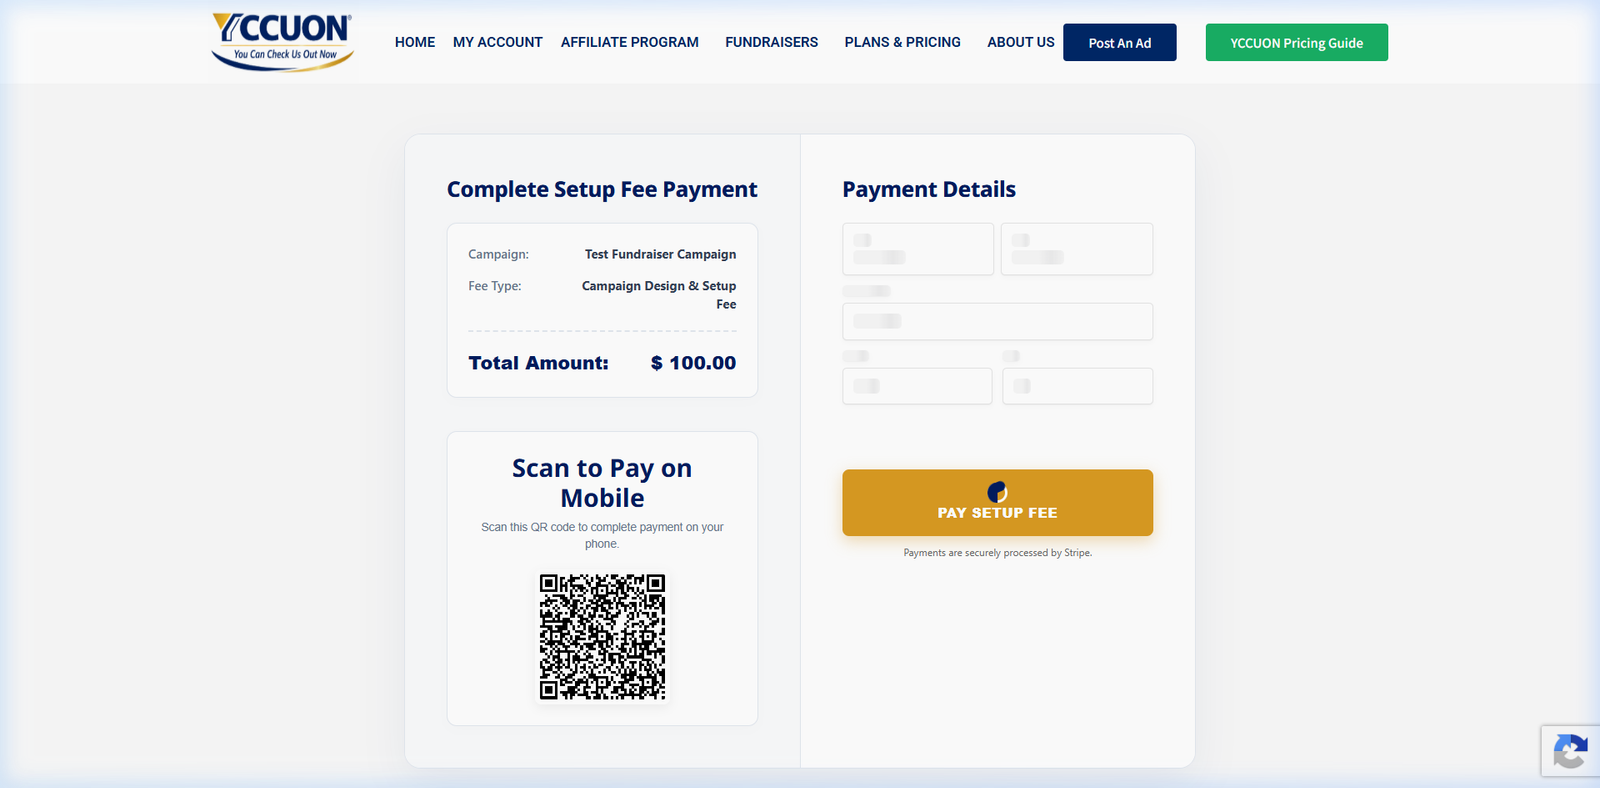
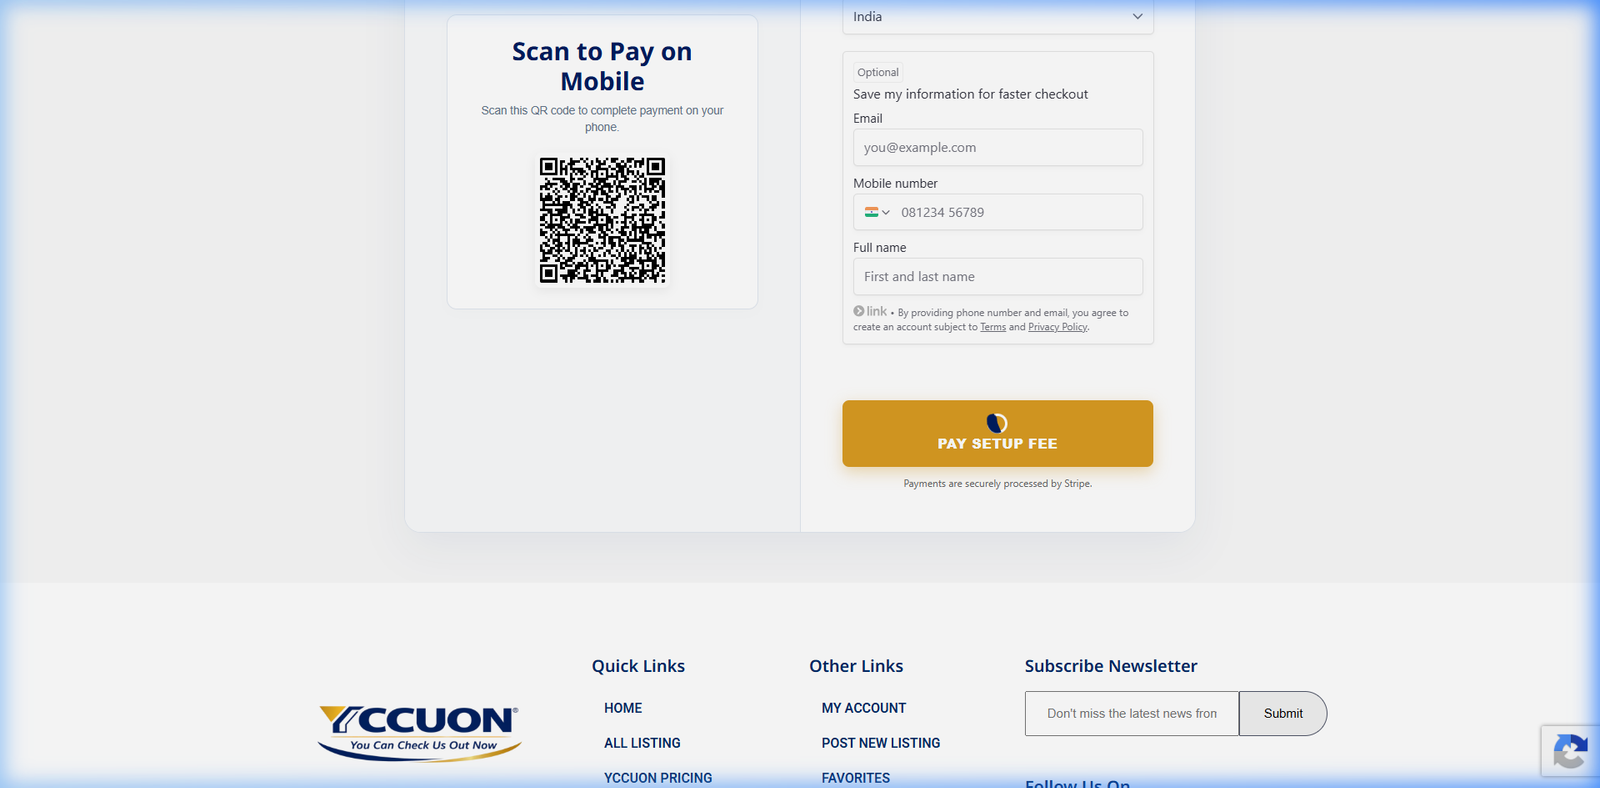
Once the details form is submitted, click "Pay & Launch Campaign" (unless your setup fee is waived). This opens the billing checkout page to settle the one-time design setup fee. Once processed, your campaign details are sent to our graphics design team.
Campaign Design Validation & Launch
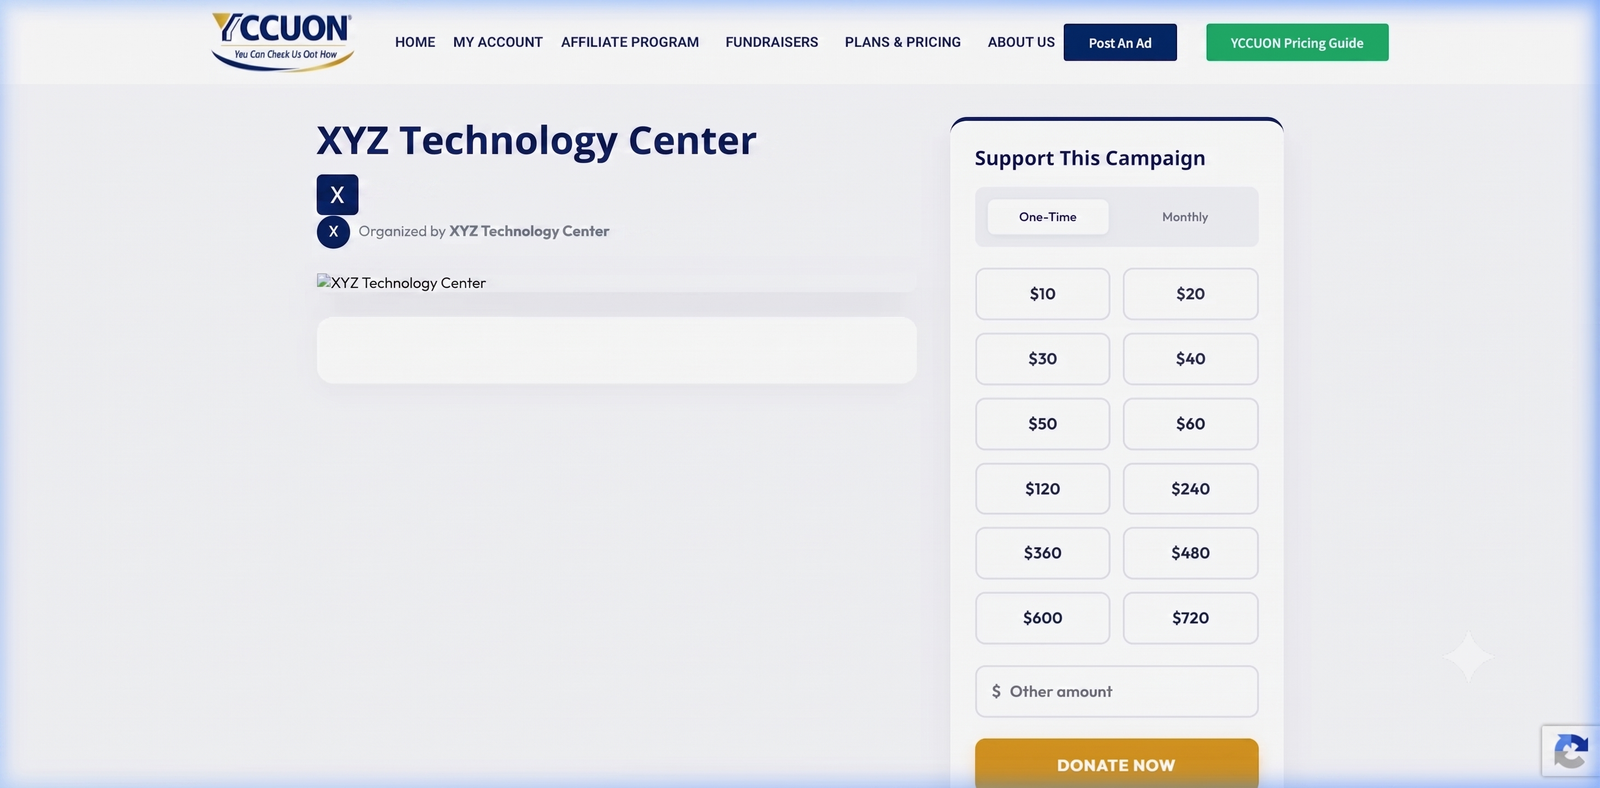
Our design team reviews your text, publishes your storefront, and emails you a unique campaign link to share with supporters. Supporters visit this page to purchase saving passes.
Step 3: Managing Your Roster
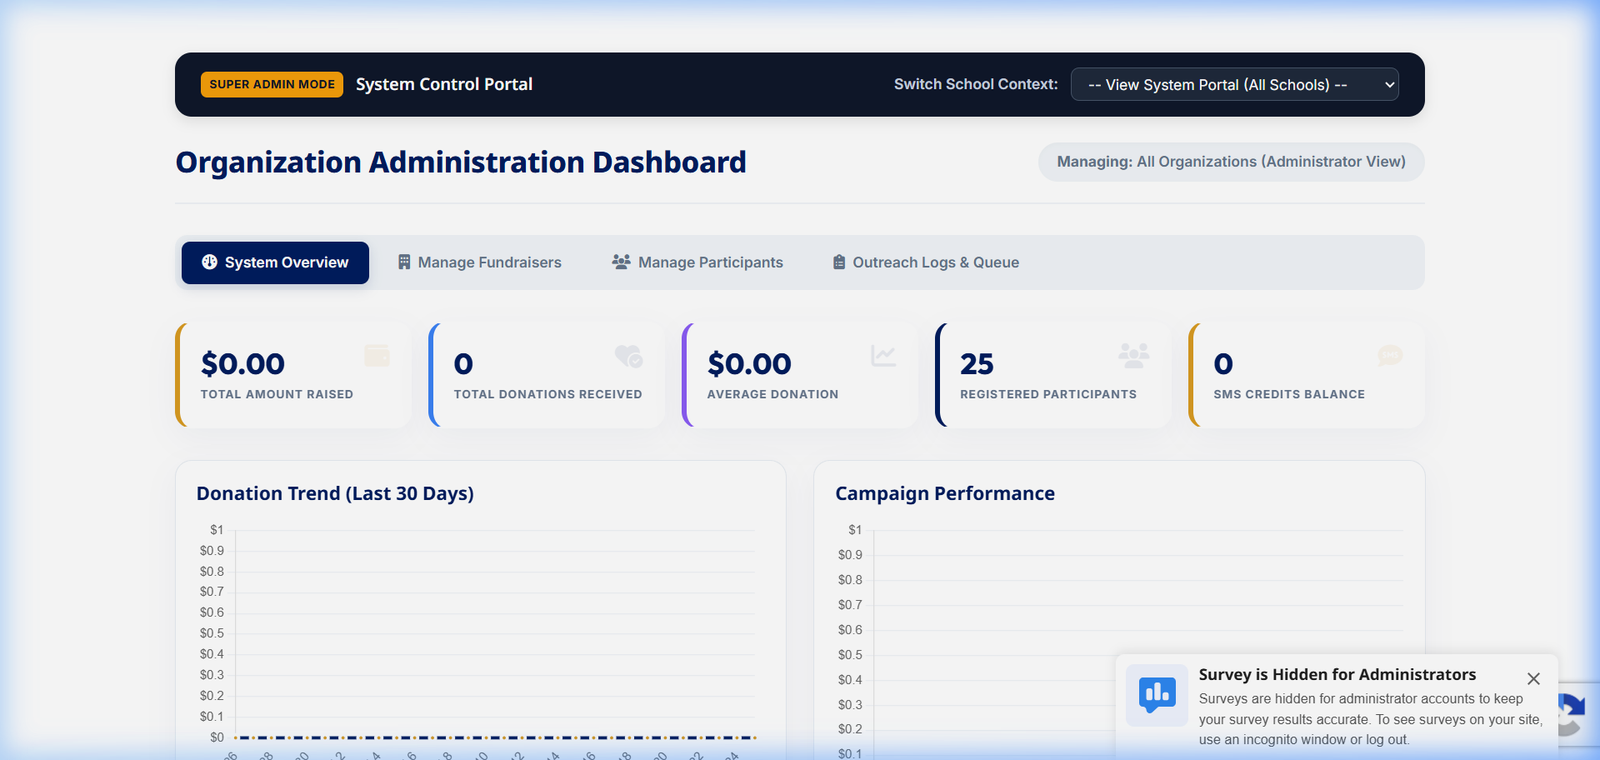
Under the Fundraiser Organization track, the portal activates multi-participant structure setups. A comprehensive administrator dashboard allows the organizer to manage roster invitations, track individual scores, review texts sent, and audit donation distributions.
Organization Dashboard Modules
Log in to your dashboard to access these modules:
Administrative Roster and Stats Dashboard Panels
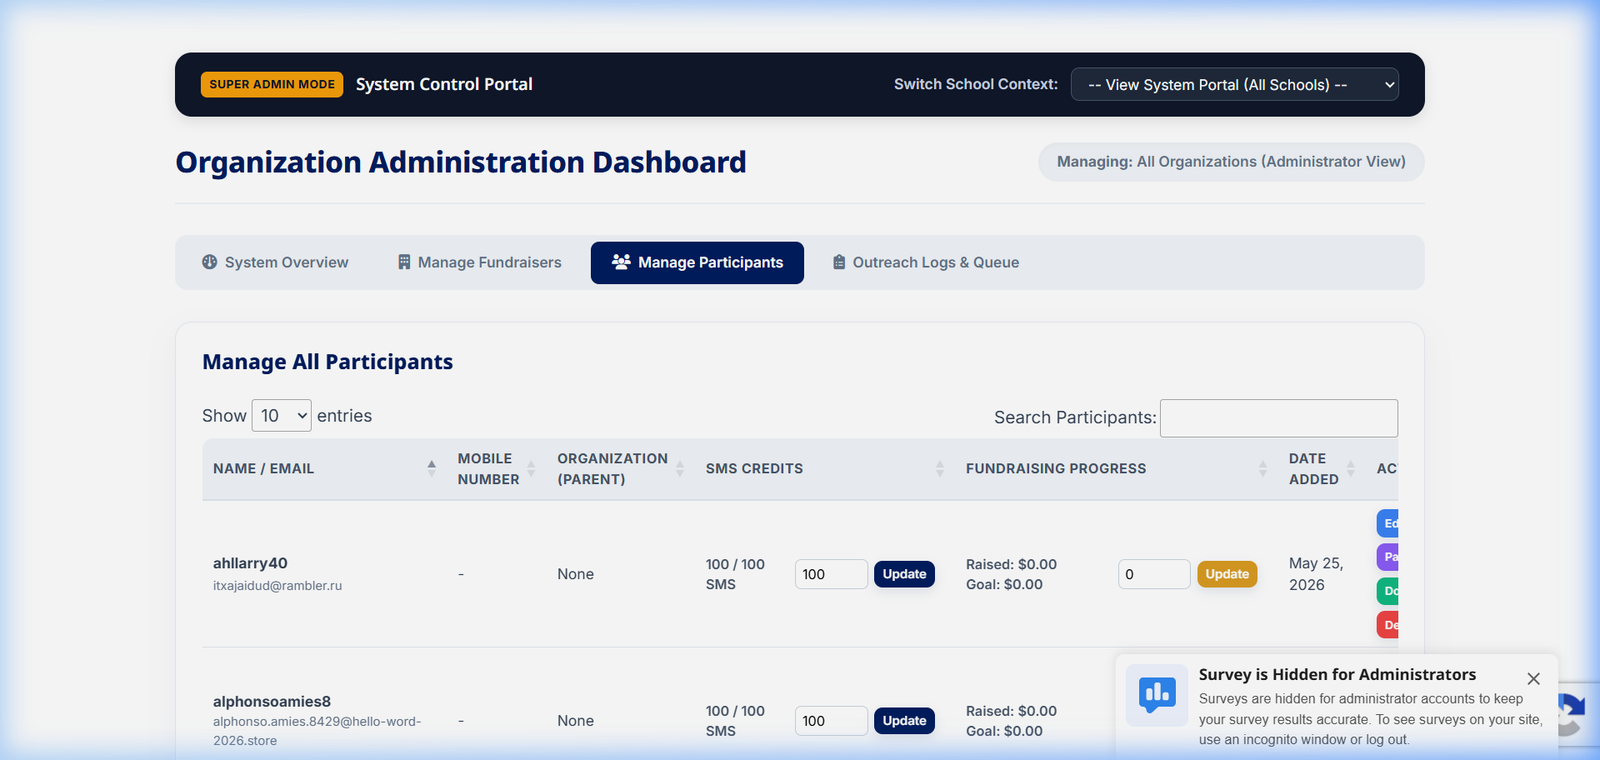
Participant Registration & Approval Flow
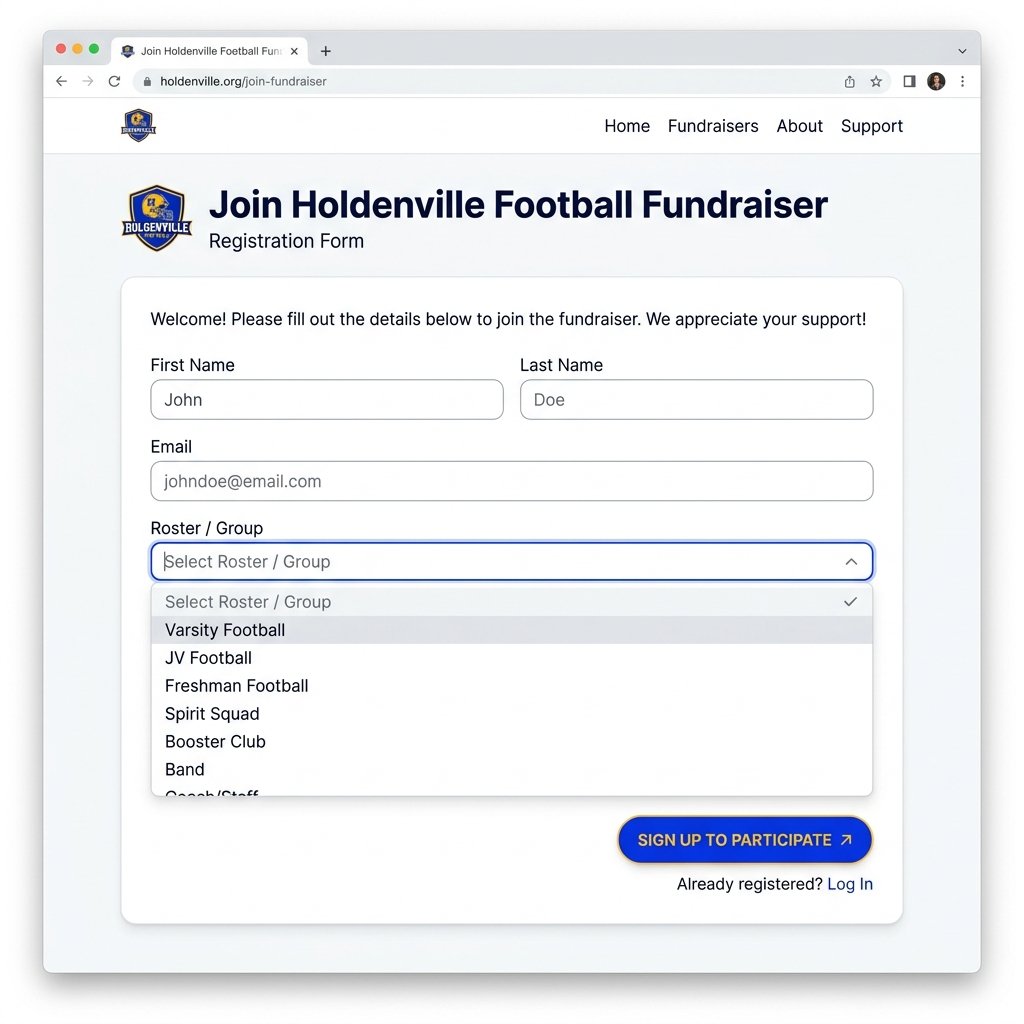
Roster members (students or players) register under your campaign page using the mobile signup link. They fill out their details and click submit. You will approve their account in your dashboard before they can start adding supporters.
Step 4: Adding Your Supporters
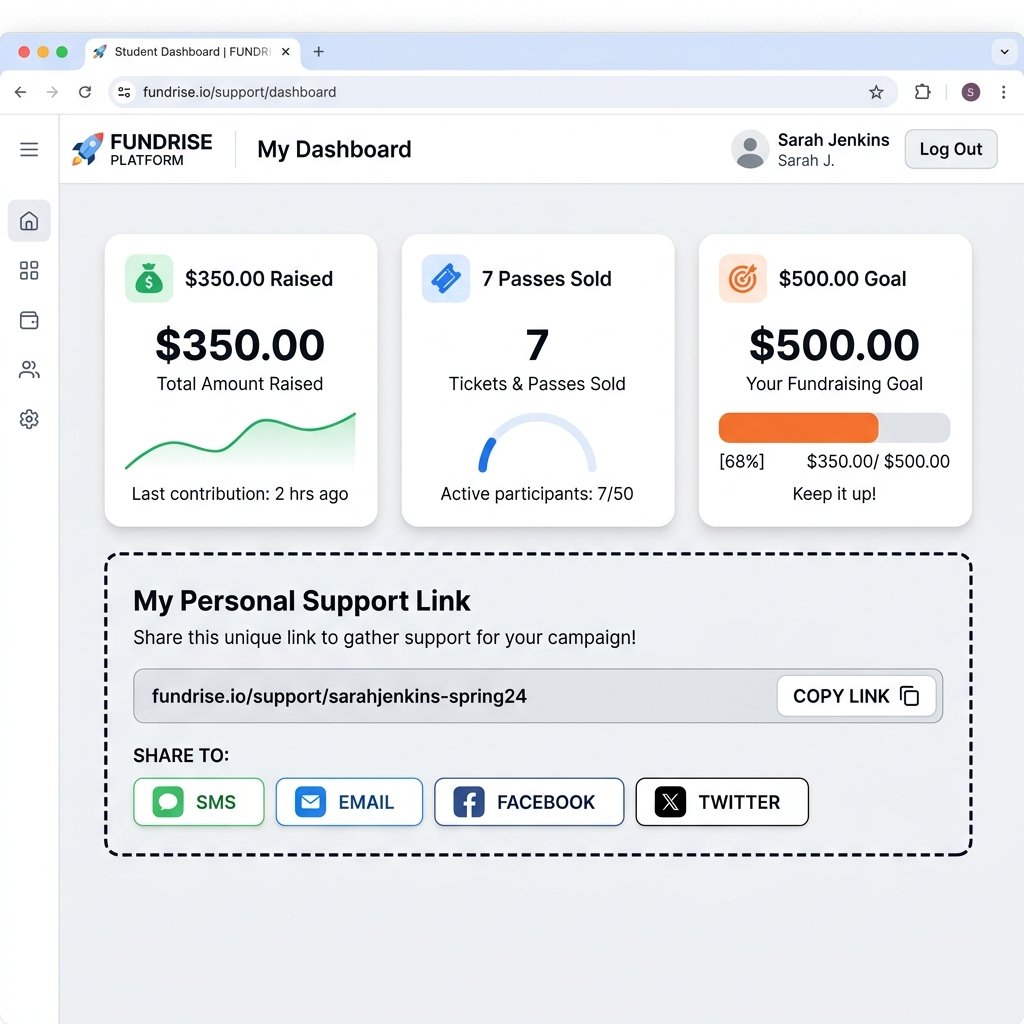
Once authorized, the participant logs in to their dashboard. To build outreach messaging target directories, participants populate their supporter lists:
Option A: Single Manual Entry
Participants add individual sponsors by submitting their name and cell phone number inside the panel form.
Option B: Bulk CSV Upload
Participants upload standard spreadsheets containing multiple supporter phone numbers to add multiple contacts instantly.
Step 5: SMS Outreach & Payouts
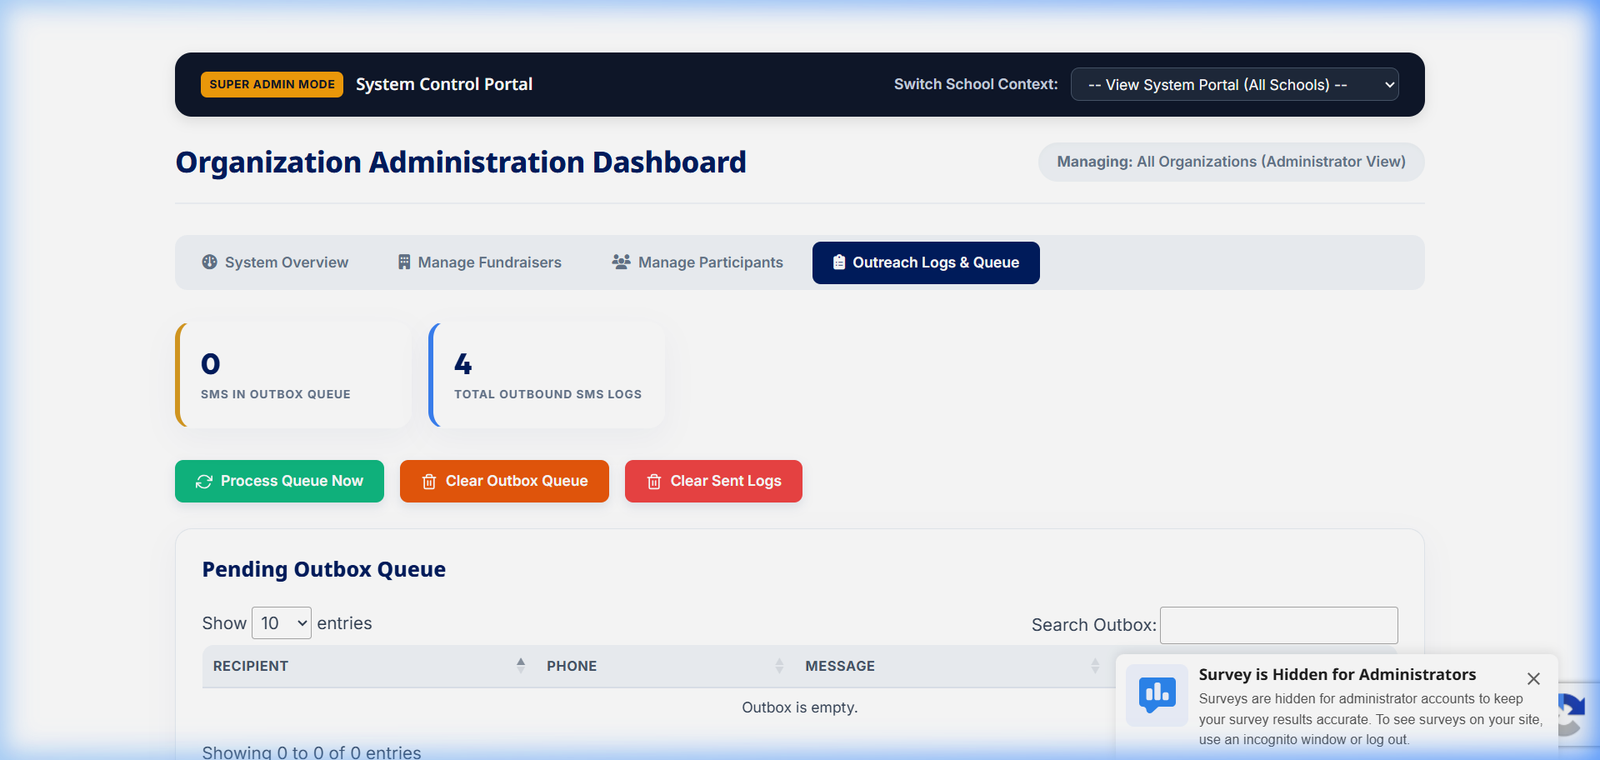
Once the supporter contact list is added, you are ready to start. The system sends out automated marketing text messages containing the participant's unique storefront link.
SMS Dispatch Queue & Delivery Logs
Donor Checkout Flow
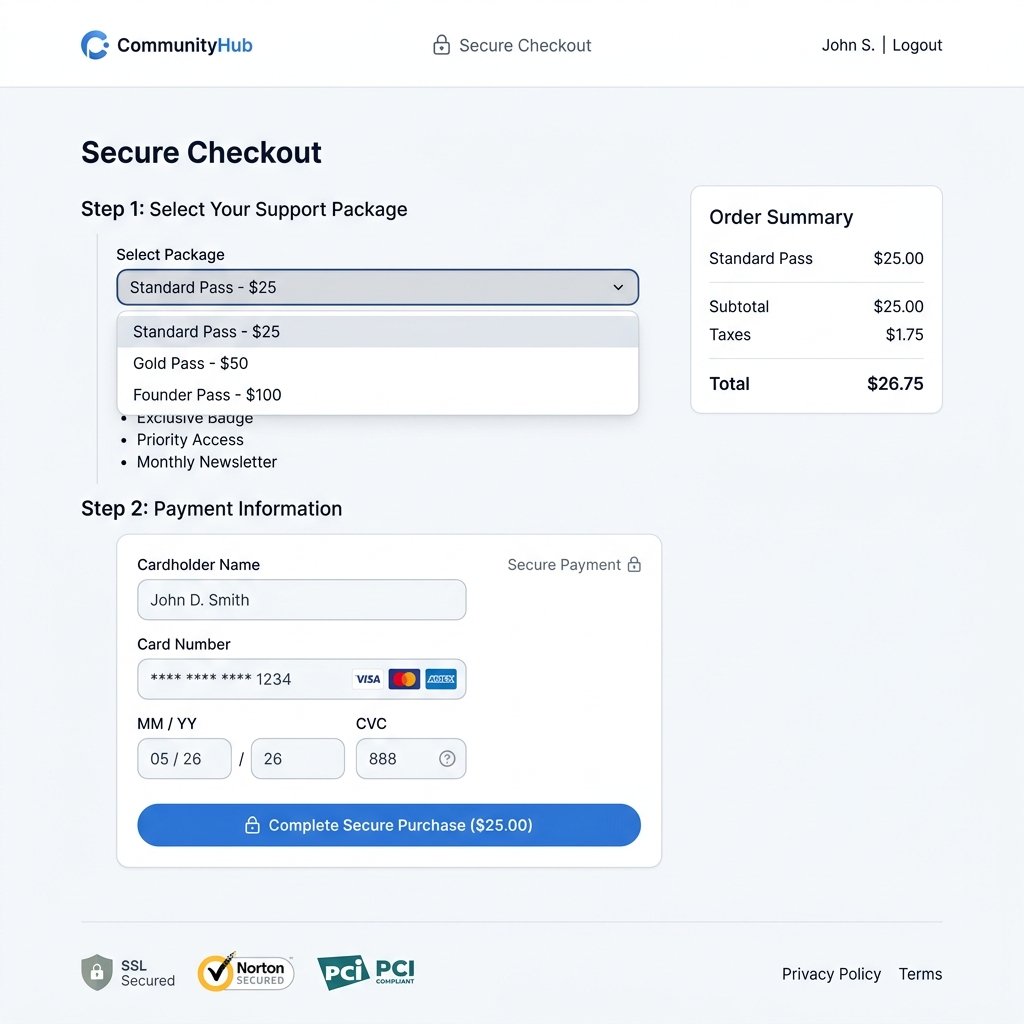
Supporters click the link in their text message to view your storefront. They can purchase savings passes or make a direct donation. They can choose standard, monthly, or annual subscription payment structures.
Split Payout Architectures
Revenue is split 85/15: 85% goes directly to the organization and 15% is retained to cover transaction processing and support operations. Distribution is handled based on your chosen payout method:
- Track A (Stripe Connect): Splits occur instantly and electronically at the point of sale. Payments are automatically batched to your linked checking account.
- Track B (physical Check): YCCUON securely escrows payment balances. The platform compiles donation reports and issues a consolidated physical check net of fees to the e-signed W-9 mailing address.
Real-time Metrics Tracking
Each donation is tracked dynamically. Individual participants can view transaction logs credited to their unique URL inside their personal dashboard, while the fundraiser organization dashboard aggregates all analytics for clean program bookkeeping.